![]()
![]()
![]()
![]()
Converting Nikon SA-21 adaptor to SA-30
I think any person with reasonable manual dexterity and few simple tools can do it but I cannot assume any responsibility for any damage that can be done to the scanner. You are welcome to follow my procedure, but YOU ARE DOING THIS AT YOUR OWN RISK!
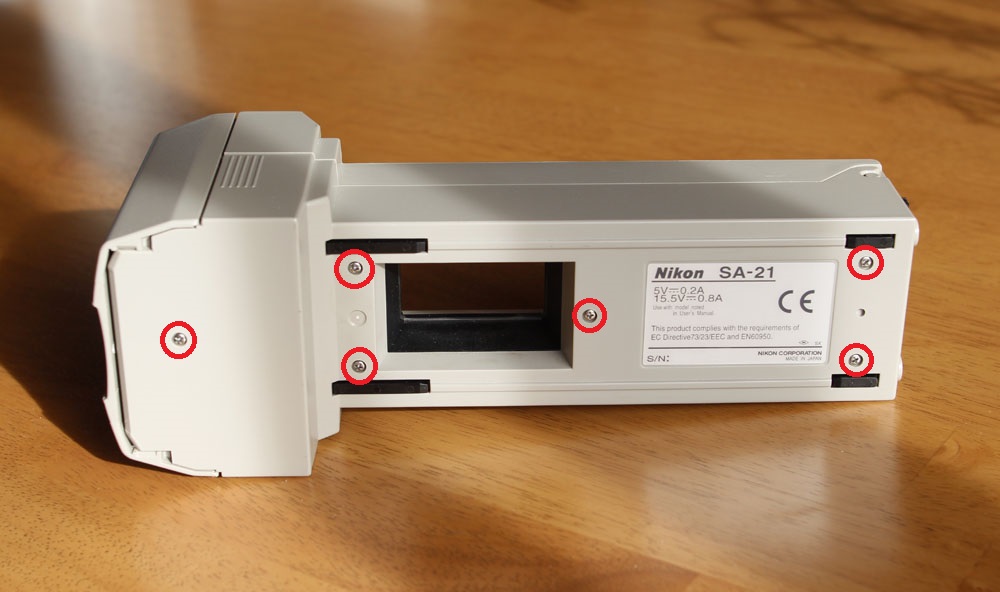
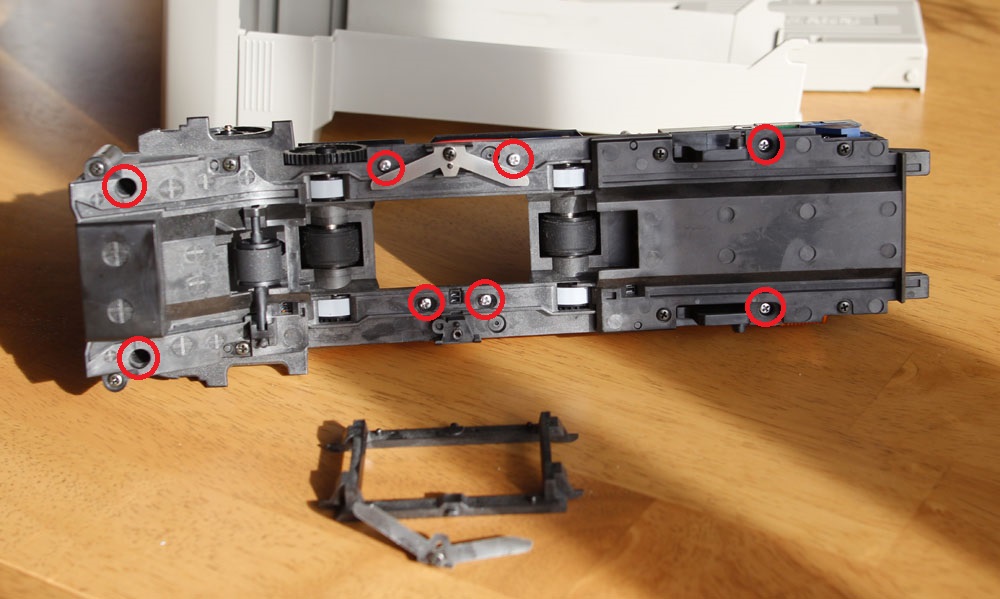
1) Set the Nikon SA-21 on a clean area. Remove these 8 screws on the back of the unit.
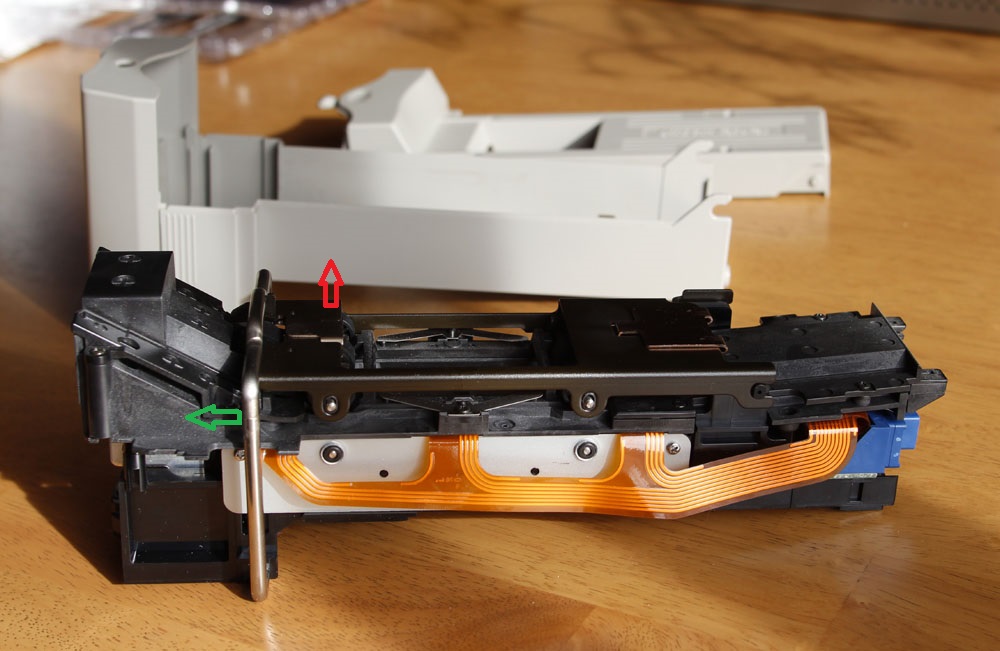
2. Open the adaptor. Push the locking bracket to open position (green arrow), and hinge up the top roller assembly (the bridge) to vertical position (red arrow). When reassembling, the orientation of the locking bracket is not important as it is symmetric. All you will need to remember is that it is the right way around, has to be loaded first into the tilt limit guides, so that it will then later fit into its pivot point socket. This is not very difficult.
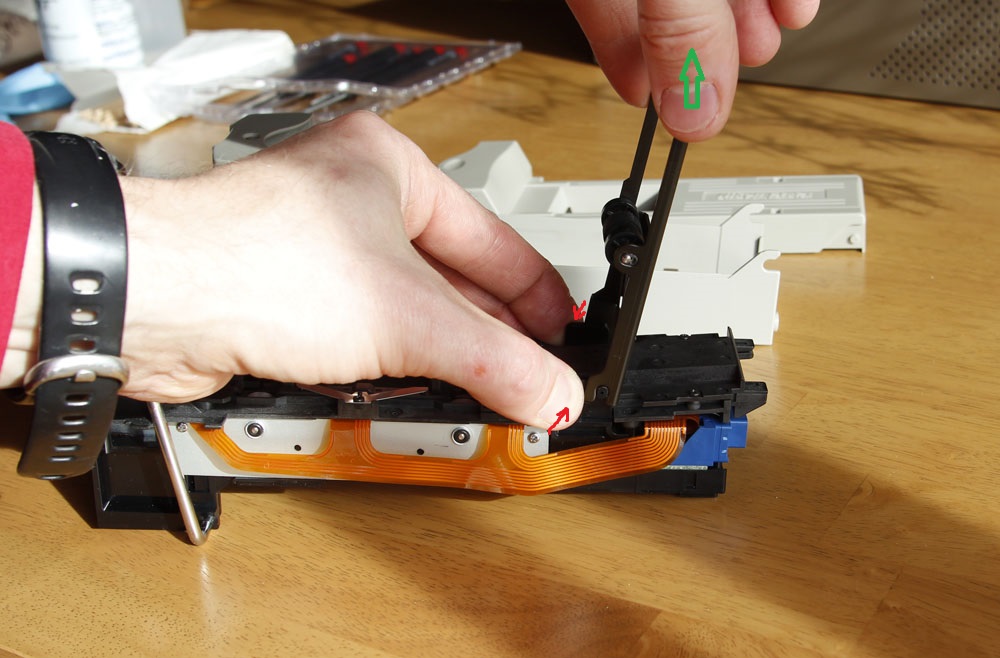
3. Squeeze the plastic tabs (red arrows) and disconnect the top roller assembly (green arrow).
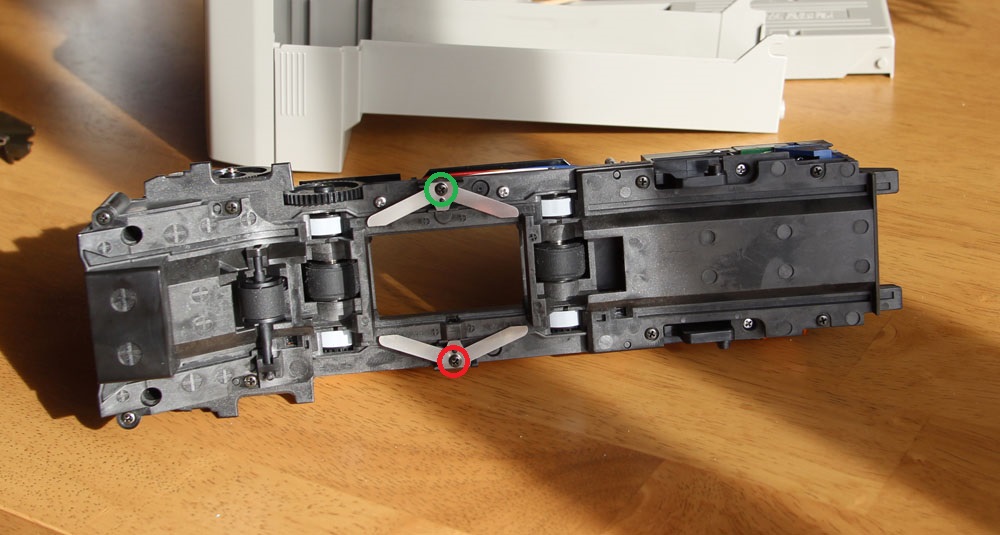
4. Loosen by few turns the screw indicated by the green circle and remove the screw indicated by the red circle.
5. Remove the little black plastic bracket. Remember the way is was sitting - it has two tabs and they are not the same thickness - you will have to put it back the same way later.
6. Remove 8 screws indicated by the red circles.
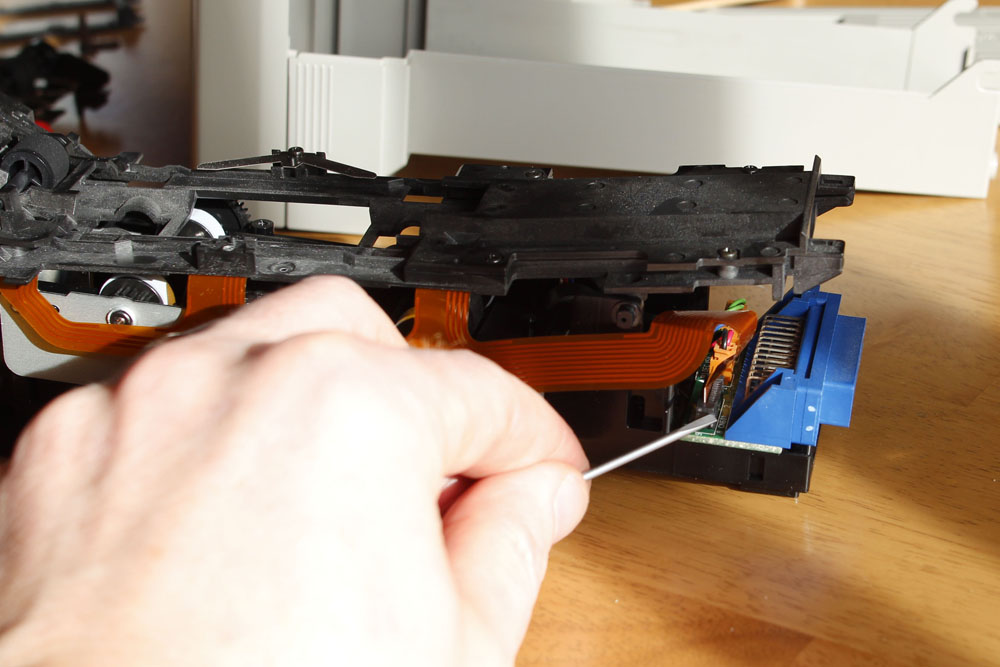
7. Disconnect the flex cable by lifting the pressure bracket on that connector. You don't have to do this step, but then the following steps are a little inconvenient - you have to be careful while working with the flex cable connected.
8. Lift the top part of film transport assembly and set it aside. If you skipped the Step 7, you will have to maneuver carefully to no damage the flex cable.
9. By the way, now its a good time to clean all rubber rollers with alcohol!
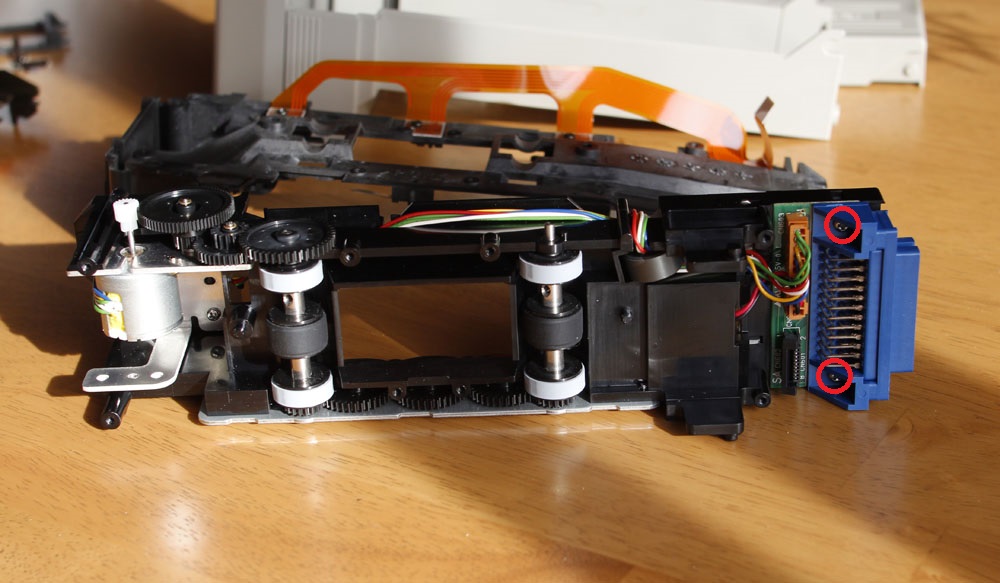
10. Remove the two screws indicated by red circles above.
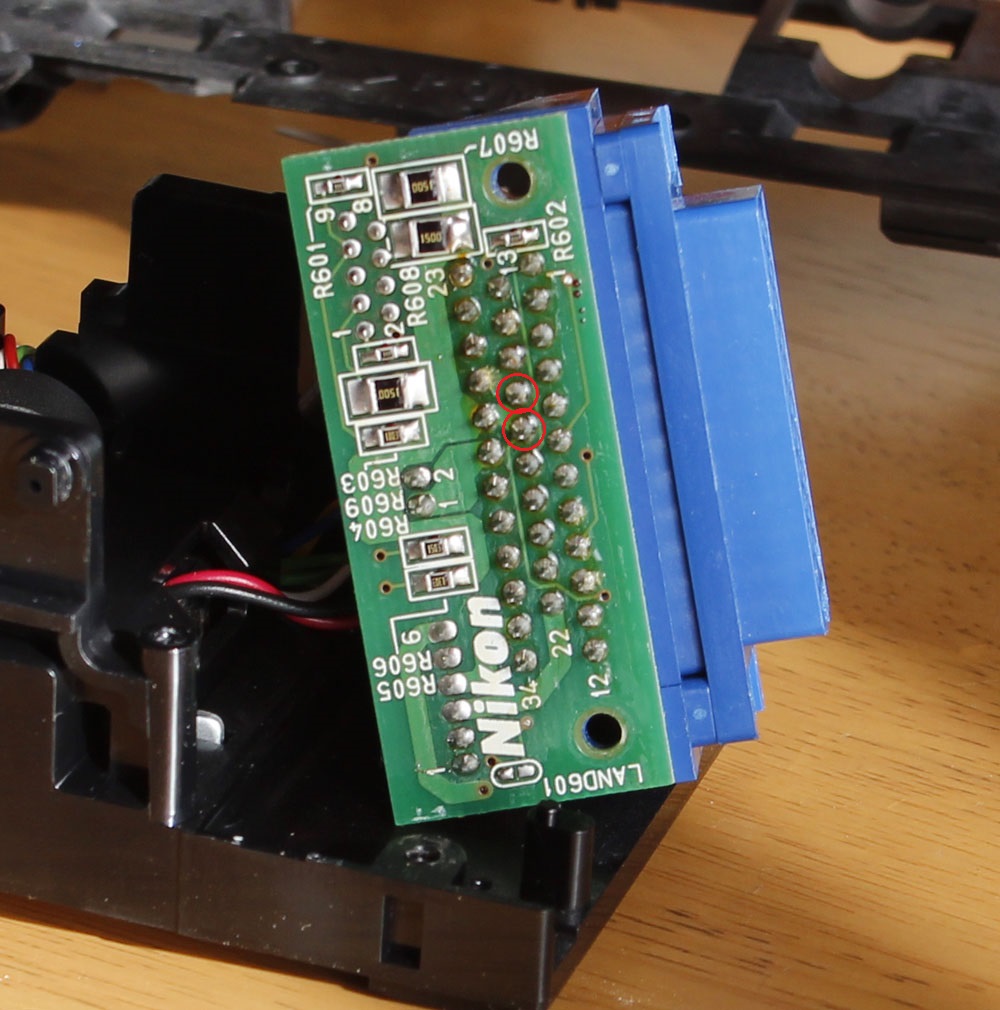
11. Flip the connector PCB around. Converting the SA-21 to SA-30 requires only one modification - short the pins 16 and 17 indicated by red circles above.
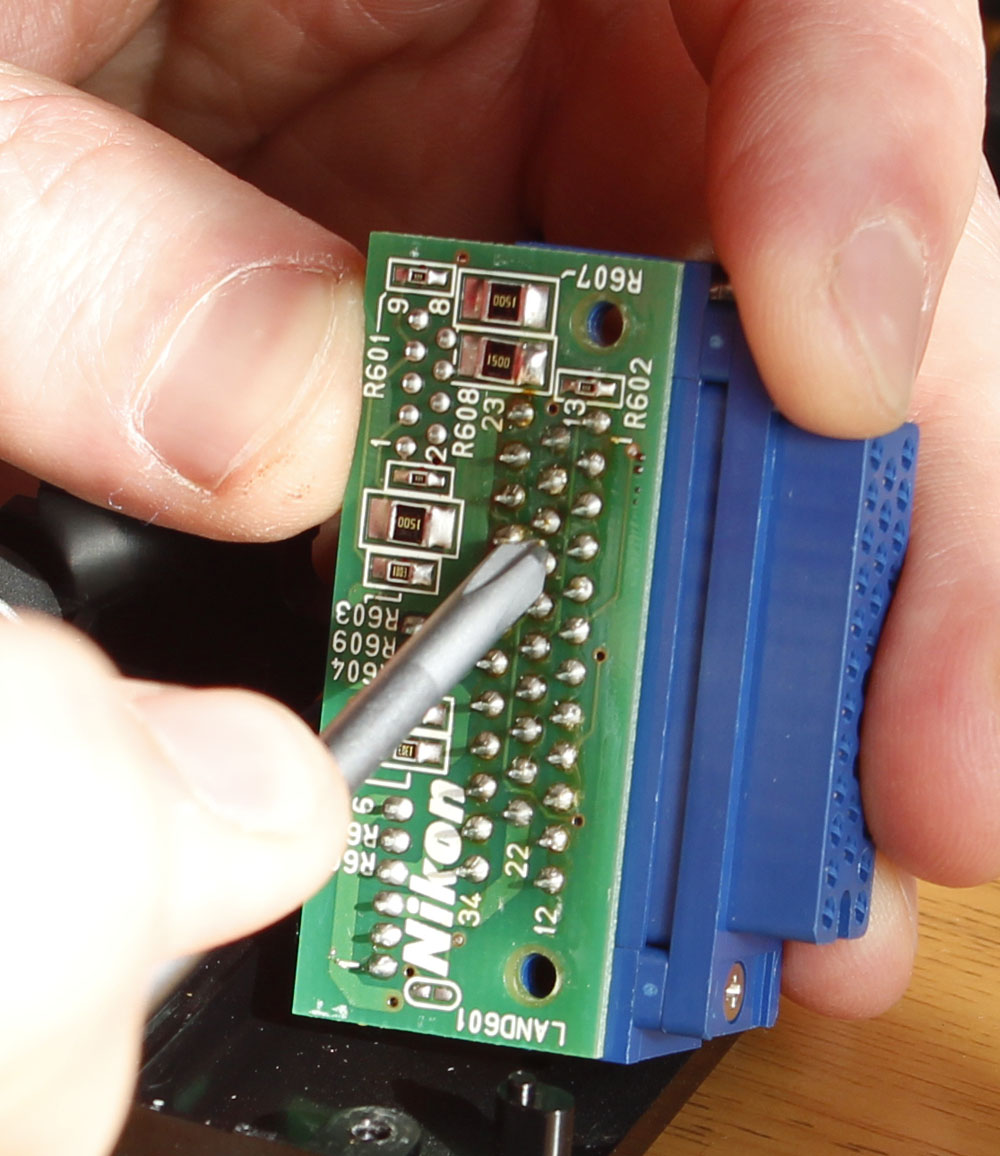
12. I would recommend first to bend those pins toward each other - small Phillips screwdriver is very handy for that.
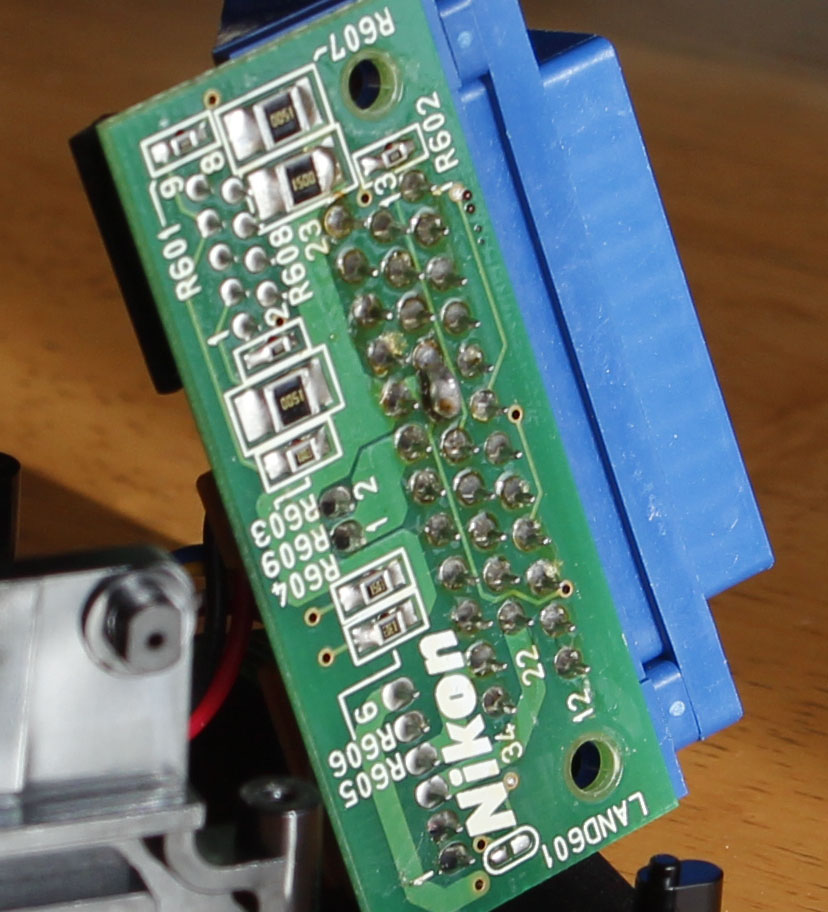
13. Then solder them together. My solder looks ugly, I am sure you will do much better job!
14.
Reassemble in the reverse order.
Helmut Stöpfgeshoff points out on his
website, that
you need to make sure you do not tighten all screws as tightly as they were
beforehand. The screws were originally tightened by a high speed machine, which
caused them to become quite hot. Because of this heat, the screws had been
slightly melted into their fitting points. This explains why they felt so tight
to unscrew. He also recommends thoroughly dusting down all components before
putting the adaptor back together. Make sure that you only use a very soft brush
or blower when doing this. Be particularly careful when dusting the lens of the
light-sensors.
There is NO need to oil or lubricate the moveable components
in any way….
Only test your adaptor after it has been completely reassembled.
Even if only the top plate has not been re-attached, the adaptor will not work
well in your scanner…