![]()
![]()
![]()
![]()
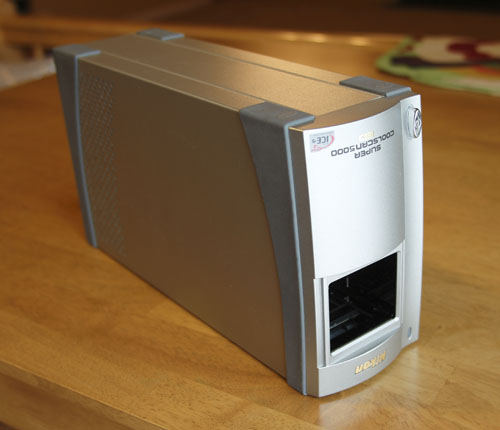
Realignment and Replacement of LED source in Nikon Super Coolscan LS-5000 and LS-4000.
The scanner may report a hardware failure upon initialization (fast blinking upon power-up). Unfortunately I had not found a way to decode them, so you just have to inspect everything and try. If the scanner reports a hardware error (and Nikon Scan reports an error at start-up), but then allows you to make scans, then most likely you have a dirty mirror. The procedure for cleaning the mirror is here. In the case the mirror cleaning does not help, you may have a degraded LED source. I had replaced the LED sources in both LS-4000 and LS-5000 - this is straightforward and the great news is that this source is the same for LS-40 (aka IV), LS-4000, LS-50 (aka V), and LS-5000. So just buy a working LS-40 on e-bay for spare parts.
In the case of Nikon Coolscan LS-4000 (and LS-40) you will follow the steps 1) through 15) of the Nikon 4000 disassembly procedure. At that point the LED source (black part labeled PC-GF20) is exposed and can be replaced. In the case of Nikon Coolscan LS-5000 the required disassembly is much less extensive.
For Nikon LS-5000 scanner follow these steps:
1) Unplug the power & USB (Firewire) cable and remove adaptors. Set the scanner upside down on a clean area.

2) Remove these 6 screws on the back of the unit.
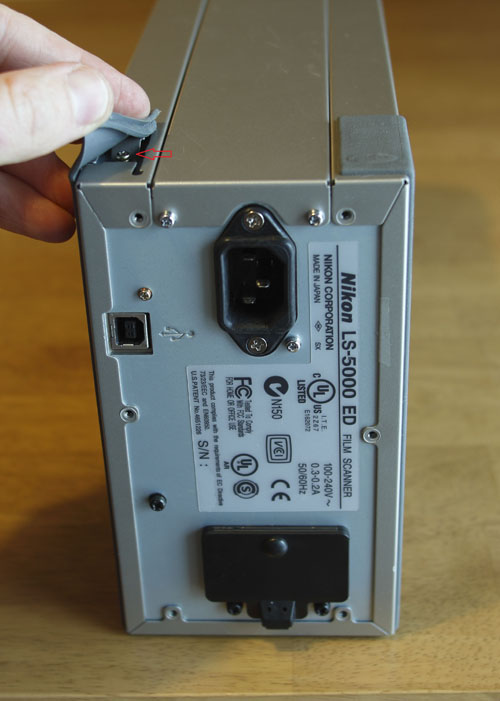
3) Pull out the rubber pads as shown by a red arrow above. There are 4 pads in the corners on the bottom of the scanner, and they cover 4 screws. Remove these 4 screws and slide the metal shell off.
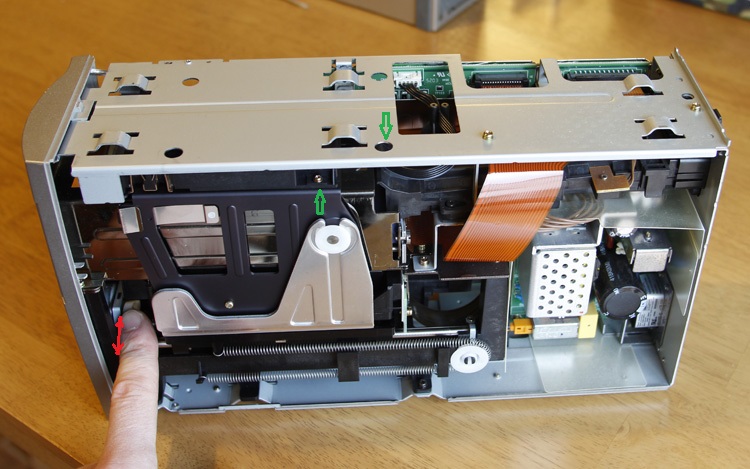
4) Turn the white plastic gear (red arrow) to move the scan head until you align the screw and the hole indicated by green arrows.
5) Once you get the scan head aligned, you can see the 4 screws indicated by green arrows through these holes.
You can see that these screws hold the LED source. The black plastic LED housing can be moved forward/backward the slots in the housing allow for total travel of about 2mm.
Re-alignment of the LED source.
6) For the reasons that I do not understand, the LED sometimes gets out of the alignment. The symptoms are that the power indicator blinks fast during the power-up sequence after both motor movements completed. The software would also report a hardware problem. I always check the mirror first. If the mirror is clean, then I try adjusting the LED position.
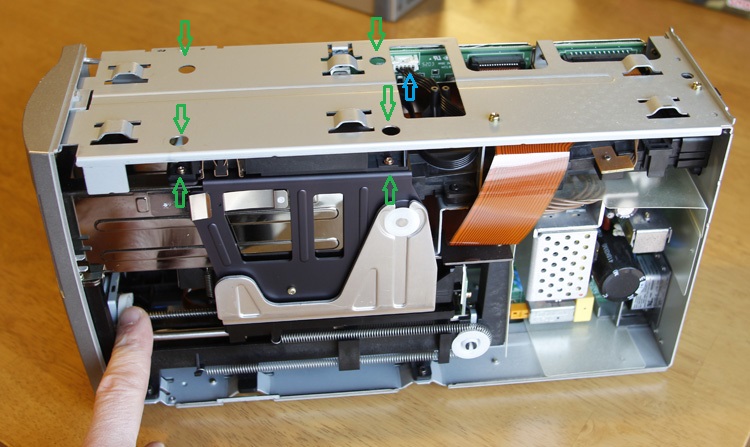
To do that turn the scanner OFF, loosen the 4 screws holding the LED housing (indicated by green arrows in the photo above), and move the LED housing forward or backward by about 0.5 mm. Tighten the holding screws and turn the power ON. See if the scanner passes the initialization without rapid flashing of the power indicator. If you are lucky and the scanner passes the power-up initialization without rapid flashing, try to establish the range of LED positions that allow power-up initialization without rapid flashing. Then position the LED source in the center of that range and tighten the screws.
Replacement of the LED source.
7) If the LED source need to be replaced, remove the 4 screws holding the LED housing (indicated by green arrows in the photo above). Replace the LED source. Then proceed to the step 6) above and align it.
Disconnect the cable at the socket indicated by the blue arrow and you can pull the LED source out. Replace it and re-assemble in the reverse order.
Unfortunately the metal frame of LS-40 and LS-4000 does not have the holes to remove these mounting screws so the disassembly is much more substantial (steps 1) through 15) of the Nikon 4000 disassembly procedure). otherwise the replacement is the same.
If you need to further disassemble LS-5000 for scan head gear repair proceed to the next step:
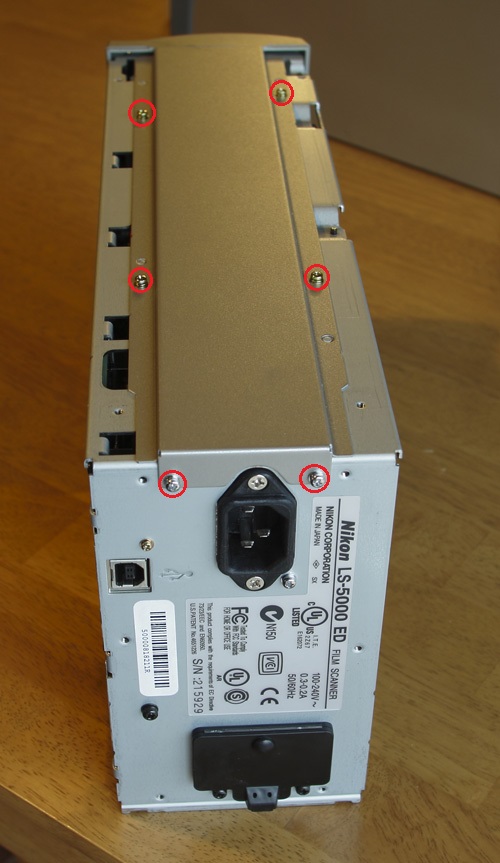
6) Remove the 6 screws indicated by red circles. From this point on the disassembly procedure is identical to that of LS-4000, proceeding to the step 5) of Nikon 4000 disassembly procedure.